Running Ruby And Rake (and albacore) Without Installing Them
One of the more frequent complaints that I’ve heard about using Ruby and Rake to build .NET systems is that you have to install yet another framework and learn yet another language to be able to use it. In a large team or on a project that involves a significant number of computers, installing the runtime may be a time consuming maintenance problem. I’ve even heard of cases where people are just not allowed to install stuff from the internet or from specific places on the internet or whatever. Truthfully, I’ve been very dismissive of this in the past. I’ve just been telling people that they should just get over it and install the tools that get the job done. That’s probably not the best strategy. Instead, I’d like to address the concerns and offer a solution.
In most of these situations you can still take advantage of ruby, rake and albacore. To do this, you need to have at least 1 computer that is allowed access to the internet and has the ability to download and install ruby, the rubygems system and individual gems. Ruby does not have to be “installed” on a computer for it to run. You can download the standard ruby runtime and copy it to a folder of your choosing, running it from that location. If you want to call ruby or any of it’s components from anywhere on your system, you just need to add a reference to the path you copied it to, in your PATH environment variables. In a Windows environment, the easiest way to get Ruby on your system is to use the installer packages over at http://RubyInstaller.org – but again, you don’t need to use the installer. You can also use the 7zip package and just unpack it anywhere you want.
Get The Ruby Runtime
Since the ruby runtime itself is xcopy deployable, this means that every ruby script and binary is also xcopy deployable. You can run your gems and the gem system itself from the same arbitrary path that the ruby runtime is installed into, because ruby and rubygems are smart enough to install all of these packages into the runtime folder structure.
After downloading the ruby runtime (I recommend v1.8.7 at this point), unpack it into your project folder. You should see three folders that represent all of the ruby needs for your system.
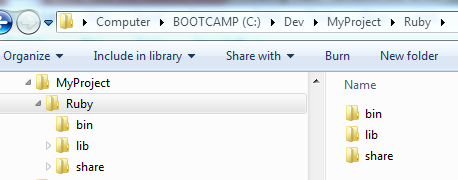
And that it’s! you’re done! You can now run ruby from the “bin” folder that you just unpacked. Any .rb script file that you want to run can now be run by calling the “ruby” command from this folder.
To verify your ruby runtime, open a command prompt in this folder and you should be able to check the ruby version like this:
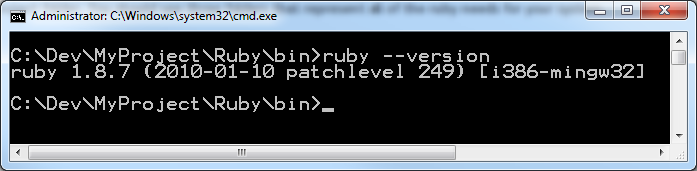
Here, you can see that I’m running v1.8.7, with the patch level and release date, etc.
Installing Your Gems
The RubyGems system is quite amazing in both it’s simplicity and it’s functionality. It allows you to install pre-packaged scripts and binaries that provide a wealth of new functionality and capabilities for your ruby installation. To install a gem, just run “gems install
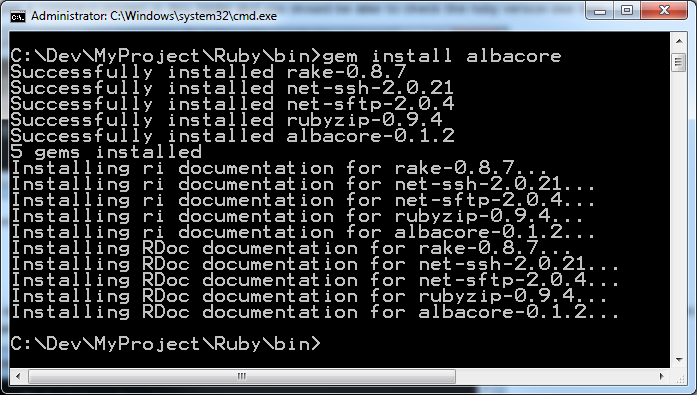
You can see that running “gem install albacore” brought more than just albacore down to the computer. Albacore has provided a list of required gems that it needs to run and the gem system has automatically downloaded and installed them for you. But the best part about this is that albacore and all of it’s dependencies were installed into the ruby folder structure that we executed the gem system from.
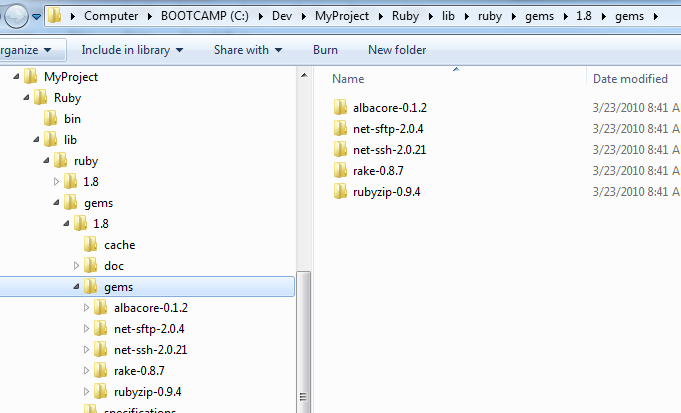
You can see the entire folder structure for the ruby runtime is set up to be a self contained sandbox. This gives us a lot of flexibility in how we setup and configure specific versions of the ruby runtime, allowing multiple copies of the same version on the same machine even (as I’m writing this, I have 2 distinct copies of ruby 1.8.7 on my machine, plus IronRuby and Ruby 1.8.6).
Commit To Source Control And Ship It To Your Team / Build Server
Let’s use a little bit of magic internet time now and fast forward to the point where you have your actual project set up and running inside of the “C:DevMyProject” folder from my example screen shots. Once you’ve got this going and you have your rakefile built, you just need to commit the entire “ruby” folder structure to your source control system. Doing this will allow all other project members – including your build server – to have direct access to the specific version and configuration of the ruby runtime for your project. It is nothing more than another tool that is committed to your source control system, like nant, structuremap, ncover, etc.</p>
If you want to make it easy for people to run your rakefile without having to remember to type in the “rubybin” path, you can create a simple batch file like this:
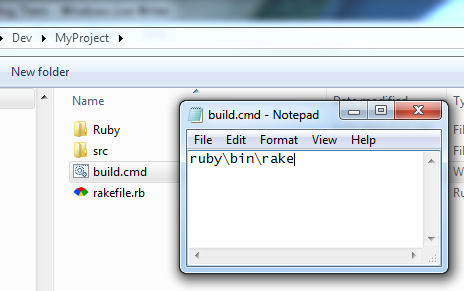
The Rake system was installed with albacore, as one of the dependencies. Running “rubybinrake” from the project’s root folder will tell it Rake to execute the “rakefile.rb” script. Adding a “build.cmd” batch file will make this a no-brainer for the entire team.
Other Considerations
For those of you who have been worried about the cost of installing and maintaining the ruby runtime and it’s various dependencies for your rakefile, I hope this will give you some insight into how you can handle that. If your team is worried about using non-Microsoft technologies, you can still get albacore running (though with a few limitations) using IronRuby. IronRuby can be treated as just another ruby runtime, and all of the xcopy deployment that I’ve shown here works the same.
Not every project that runs a rakefile should do this, though. The ruby runtime is a 28 meg folder structure without any of the gems that you’ll need. Smaller projects, open source projects or teams that are already familiar with ruby should probably opt for the team members maintaining their own local installations of the ruby runtime. However, on a larger team where the 28 meg cost is insignificant compared the rest of the project, this setup may help to provide a few more options to the team.