AngularJS–Part 1
This is an introduction to AngularJS and is mainly meant as a internal reference for our development team. More posts on the topic will follow.
Why AngularJS?
AngularJS is one of the most popular Open Source JavaScript frameworks. It is developed by Google and has a huge community surrounding and supporting it. We use AngularJS to migrate the MS Silverlight based client of our complex enterprise application to HTML5/CSS/JavaScript.
Several factors were deciding in the choice of the framework. Alternatives that we have considered were
We have been developing a lot of infrastructure on our own in the past. In the beginning this was a (sometimes huge) advantage but became more and more a burden over time. Thus we decided not to go this route this time and as a consequence to exclude variant one.
Base on our experience with Silverlight we also wanted to avoid a proprietary or closed source solution.
AngularJS seems to have the biggest and most active community. For pretty much any question in and around AngularJS one can find answers on StackOverflow. This is a very important point for a team where not every member is an expert. Quick accessibility of help and insight is a big plus. It is easy to find new developers that have a working knowledge of AngularJS.
AngularJS is extremely simple to start with. Let’s just do it
Let’s start with AngularJS
To start coding with angular we need nothing else then download the angular.js file (stable branch, uncompressed) from here and use a text editor like Notepad++, Vim or Sublime to name just a few.
- Create a new folder HelloAngular.
- Download the angular.js file.
- Copy the downloaded JavaScript file angular.js into the above folder.
- Using your favorite text editor create a new file step1.html in the same folder.
- Add the necessary html tags for a standard HTML5 web page
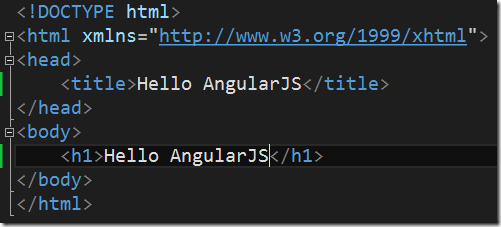
- Add angular.js to the page by adding a
- Load the web page with you favorite browser to make sure everything is ok.
- Add an input of type text to the body and use the first AngularJS directive, the attribute ng-model. As an attribute value we choose model.firstName.

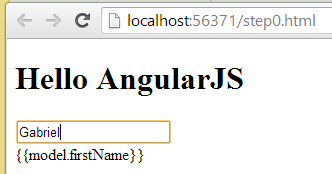
- Add a <div> after the above and use the so called mustache syntax to display the value of model.firstName inside the <div>

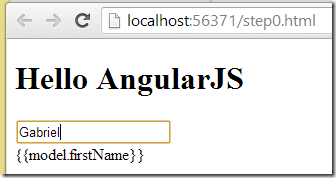
- Save the file and refresh the browser. Type something into the textbox. Note that where we defined the <div> we see the mustache template {{model.firstName}} instead of the (expected) value of the model. The reason is that we did not yet bootstrap Angular and thus up to now Angular just sits there inactive on our page.
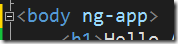
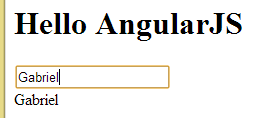
- Add the ng-app directive to the <body> tag. When Angular sees this attribute on the page it starts to parse and compile the page upon loading.
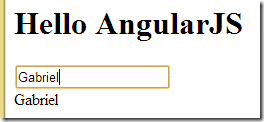
- Save the page the refresh you browser. Type your name into the input box. Notice that the value now gets reproduced inside the <div>.

Summary
I have shown that it is extremely easy to start a new AngularJS based web application. We just need one single JavaScript file (angular.js) and a text editor. AngularJS is mostly used as a client side MVC (model view controller) framework. I have introduced the view (the html page) and a basic model (model.firstName) so far. AngularJS uses directives to provide data binding. We saw how to data bind an input box by using the ng-model directive and how to display model values by using the so called mustache syntax. Angular is bootstrapped by using the ng-app directive. We can only have one such directive per page. If AngularJS sees this directive on the page it parses the page and compiles it. It is during this stage where the directives are interpreted or executed and the data binding is established.
In my next post I will introduce controllers.