AngularJS–Part 2, the controller
Introduction
This is a series of posts to describe our approach to slowly migrate a Silverlight based client of a huge and complex LOB to an HTML5/CSS3/JavaScript based client. These posts report on the lessons learnt and are meant to be used as a reference for our development teams. The first part of this series can be found here.
So far we have talked about the view and the model in the last post but we have not yet introduced a controller. A controller contains the (presentation or workflow) logic of our Web client. It is written in JavaScript. AngularJS strongly encourages us to separate concerns and put all logic/code into controllers and keep the view (the html page or html fragment) free from any JavaScript. The model on the other hand is a representation of the data we need to display or change through the user’s input.
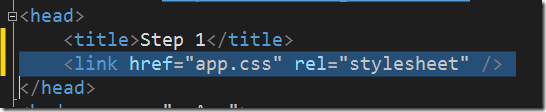
We need a place where to put our code and thus we add a new JavaScript file app.js to our folder HelloAngular. We reference this file in our html page after referencing the angular.js file.*)

*)I specifically mention this since it happened more than one time to me that I introduced a new file with JavaScript code and forgot to reference it in my view, leaving me wonder why my app would not work as expected…
The application
Now it is time to define an (AngularJS) application. Angular defines modules and for the moment our app is an angular module. We can do this as follows
![]()
Here my application is an Angular module and is called myApp. The second parameter in the module definition represents the dependencies**) that my module/app has. In our sample it is an empty array meaning that we have no dependencies so far.
**) Angular uses dependency injection similar to what we know from a typical C# application where we use an IoC container.
The first controller
Ok, finally we are ready to define a first controller. We add the controller to the controller collection of our Angular application as follows

As a developer used to code with an OO language like C# or Java we have to be aware of the fact that JavaScript is not an OO language. Yes, we can use it in a similar way as an OO language but this is definitely not its strength. Rather should we embrace the functional aspect of the language and code accordingly.
Most modern JavaScript libraries like JQuery and AngularJS do so and one consequence we see right away in the above definition of our first controller called FirstCtrl. In looking at the name of the controller we can identify two conventions typically used in Angular.
- Names of Controllers are in Pascal Case
- Names of Controllers have a suffix Ctrl</ul> The actual controller is a function wrapping all the code and state that make up the controller. In the above snippet we have a function with no parameters. As we will see below usually a controller (constructor) has one to many parameters that will be provided to the controller via dependency injection.
Data and scope
Lets first define some data in the controller. We want to define an object with properties whose values can be data bound to the view and whose values can also be programmatically set or changed in the controller. Data in a controller is usually defined on the scope of a controller. Let’s do this

But wait a second, what is a scope and how do I get a scope?
A scope as defined by Wikipedia is the part of the program in which a name that refers some entity can be used to find the entity. Here we talk about data, but the same also applies to functions. In JavaScript functions are treated much the same way as data. As we will see when defining an Angular controller we will define the data it deals with and the logic it encapsulates on the scope of the controller.
I get my scope via dependency injection, that is, it is provided to me by Angular. Thus I can just change the definition of my controller as such

Note the parameter $scope of the function. Also note that all Angular services or providers are prefixed with a $ sign.
In the above snippet we define an object model on the $scope which has two properties firstName and lastName. The properties are initialized with according values. When we now refresh our page we would expect that the property firstName of the model object is bound to our view and thus the view displays the value “Gabriel”. Try it out… Ok?
It didn’t work. Why not? It’s not working because we did not yet tell Angular to use our application myApp and with it the controller FirstCtrl. Let’s do this then. First we add the name of our application as a value to the ng-app directive which we had previously added to the body tag.

then we wrap our little html fragment with the input and the div tag into another div which contains an ng-controller directive. The value of the directive is the name of the controller we have defined.

If we now refresh the page our binding works perfectly and the initial value as defined in the controller is displayed both in the text input an the div. And with this we have shown that the binding works from the controller to the view. But does it also work in the opposite direction? To show this we need to add some logic to the controller.
Logic
Let’s add a button to the view whose click event we bind to a function defined in our controller. In the function we just show an alert with the current content of the firstName property of the model object. So let’s first add the logic to the controller. As I mentioned above functions are defined on the $scope of the controller similar to the model or data. We can do this just after the definition of the model.

Now we add the button to the view. We use the ng-click directive to bind the click event of the button to the clickMe function in the controller.

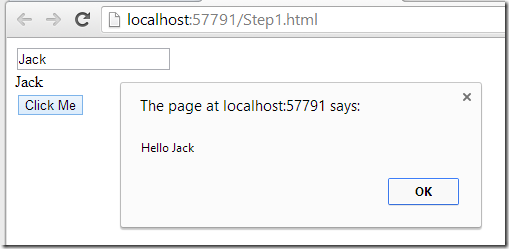
Note that this is different from the traditional way of doing things, where we would have used the onclick attribute of the button tag to bind the click event to some JavaScript code in the view. When we run the application and enter say “Jack” into the input box and then click on the button an alert box will popup greeting Jack as expected.
As trivial as this example seems and as easy as the code looks it is still a quite important concept that we have explored here. I have shown so far how we can data-bind between the model (defined in the controller) and the view as well how we can bind user actions which trigger events on the view to functions defined in the controller.
We are of course not limited to parameter-less function calls. Instead of using the $scope in the clickMe function to get the name we can as well define a name parameter on the function and show its content in the alert box
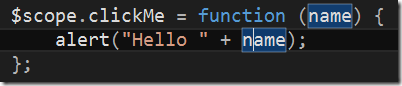
The call in the view has then to be adjusted and we have to pass the model.firstName as a parameter in our function call

Multiple controllers per view
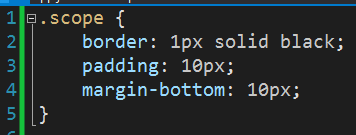
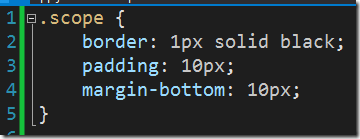
We can have multiple controllers per view governing different areas of the view. In such a scenario each controller manages a fragment of the overall page. To visualize this lets define a style that we put on each area managed by a controller. Please add a new file app.css to your folder HelloAngular and reference it from the html page.
Add a style .scope to the app.css. This style basically draws a black border around the area which is governed by a single controller.
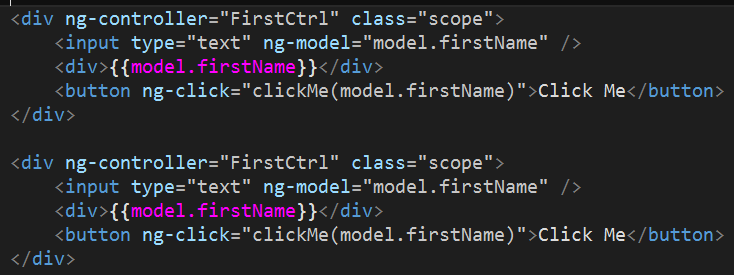
Now duplicate the html fragment in the view managed by the FirstCtrl controller and add a class scope to each of the two fragments.
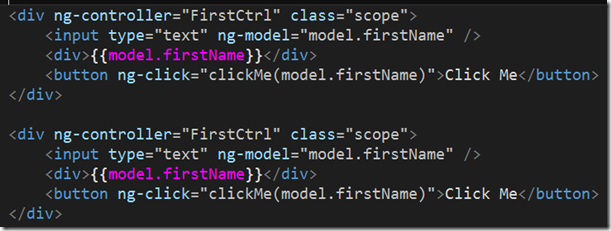
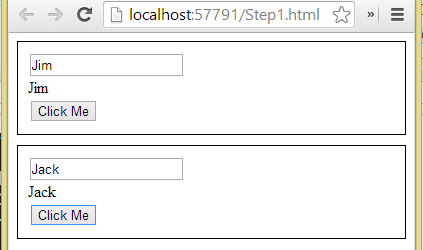
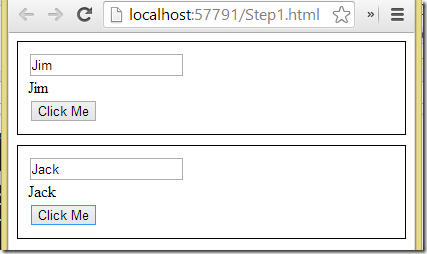
Each of the two html fragments will now be managed by its own instance of the FirstCtrl controller. These two fragments are completely independent from each other as you can verify by yourself when refreshing the view in the browser
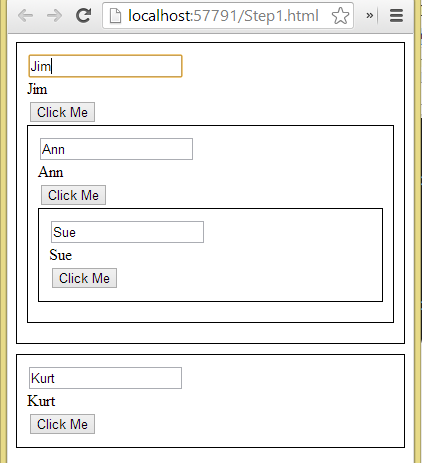
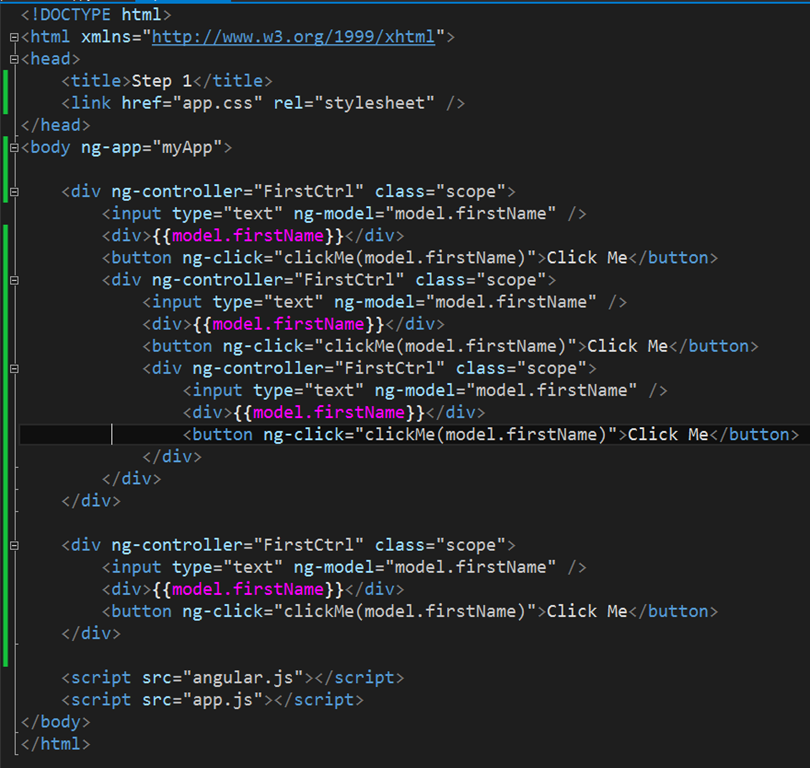
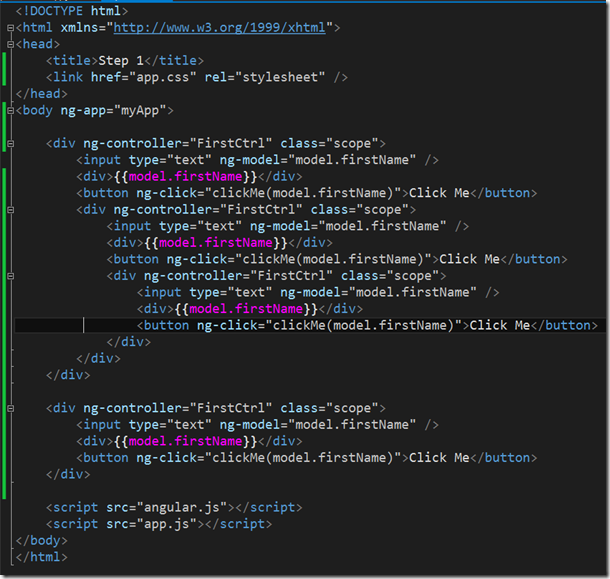
We can even nest controller instances as shown in the following sample
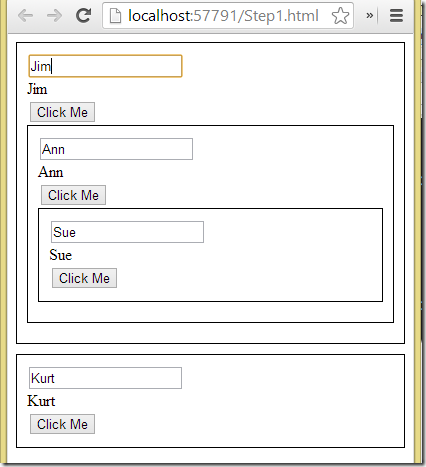
and the according (complete) html is shown here
Summary
In this post I have introduced the AngularJS controller. With this we have discussed all three pieces of the MVC (model-view-controller) pattern that is commonly used when building an Angular app. I have shown how we can bind data to the controller and we have proven that the data-binding is indeed a two way binding. We have also learned how to bind an event of a view control (such as the click event of a button) to a function defined in the controller. Furthermore we have briefly discussed how we can have multiple instances of a controller managing different, possibly nested parts of the view. In my next post I will look a bit more closely into the inheritance between controllers and child controllers and compare this JavaScript type of inheritance with the familiar one used in C#.