AutoMapper upgraded to .NET 4 and VS 2010
In the last post, I posed the question on what to do with .NET framework upgrades and OSS support. I wanted to upgrade AutoMapper to .NET 4, but I didn’t want to leave a lot of folks behind because their project isn’t .NET 4. I had a couple of choices:
- Call the last release (1.1) the last official .NET 3.5 release
- Branch it and allow both to live side-by-side
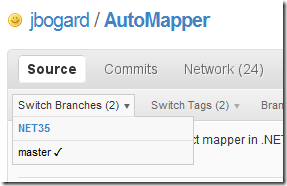
Since option #2 didn’t really cause me much extra overhead, I went for that one. To upgrade, I first needed to create a remote branch on github:
Creating a remote branch in git is a little esoteric, as for the most part, git wants to be local. To create this remote branch, I just ran:
- git push origin origin:refs/heads/NET35
More than a little esoteric, but whatever. To then start using this remote branch, I needed to create a remote tracking branch to make it easier to push and pull:
- git checkout –track –b NET35 origin/NET35
And now my local repository has both remote branches being tracked:
With both branches going, I now set about upgrading the AutoMapper to .NET 4.
###
Upgrading the project
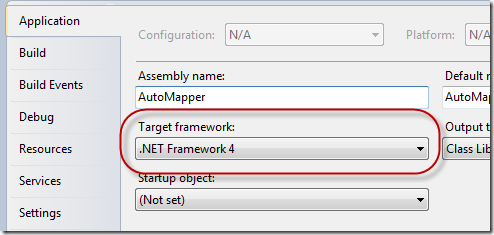
Upgrading the AutoMapper code to VS 2010 and .NET 4 was easy enough. I just opened the VS 2008 solution in VS 2010, and the upgrade wizard properly upgraded everything. Upgrading the solution files does not change the target framework, so I still needed to modify all of the project files to target .NET 4:
That was easy enough, and all tests immediately passed. I decided to leave the Silverlight 3.0 projects out of the equation, I still need a better way to support multiple runtimes easily. Some of the app.config files were automatically modified, but there were really no problems upgrading the actual projects to .NET 4.
Upgrading the build, however, was a completely different story.
Upgrading the build
Most of the build tools I used, including NUnit and psake, were still targeting .NET 3.5. To upgrade these, I first needed to download the latest psake and include the following configuration in my build script:
$framework = ‘4.0’
This told psake to use the .NET 4 framework. Next, I needed to tell NUnit to target the .NET 4 framework. I was able to do this by adding the “supportedRuntime” element:
I stuck this in my “nunit-console-x86.exe.config” file, where it already had a commented-out section for me to edit.
The last part I needed to fix was the ILMerge call in my build script. This was much trickier. I needed to modify the call to ILMerge to include the path to the .NET framework. Previously, I only needed to include the version. I created a PS function to get the framework directory:
function Get-FrameworkDirectory()
{
$([System.Runtime.InteropServices.RuntimeEnvironment]::GetRuntimeDirectory()
.Replace(“v2.0.50727”, “v4.0.30319”))
}
Quite lame, as I get the current runtime path and replace the folder name of the .NET 2 version number with .NET 4. I’m sure there are better ways, but hey, it works.
Finally, I just created a property to hold this value:
$framework_dir = Get-FrameworkDirectory
And modified the call to ILMerge to include this value:
ilmerge.exe /targetplatform:”v4,$framework_dir”
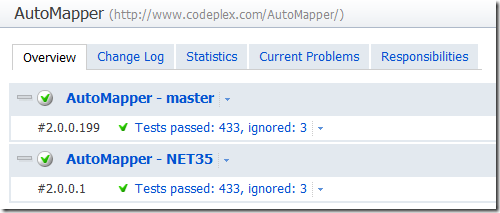
Once all that was done, I created a second build on the TeamCity CodeBetter build server:
That’s pretty much it. It was a little hairy upgrading the build, but that’s only because of the tools I use. If I didn’t have Stack Overflow, it would have been much more difficult 🙂
###
Support
The idea going forward is to apply pull requests and bug fixes to the .NET 3.5 branch, but not any new feature work. I’m not going to delete that branch, so anyone wanting to add new features just needs to fork that branch and send pull requests. Because branches are so easy to manage in github, there’s really no reason for me to just kill the .NET 3.5 version.
Otherwise, I’m getting started on the master branch on version 2.0 work. For those that have forked master and want to now point to the NET35 branch, you can just update your local upstream remote to point to the different branch.


