RabbitMQ for Windows: Introduction
Posts In This Series
- RabbitMQ for Windows: Introduction
- RabbitMQ for Windows: Building Your First Application
- RabbitMQ for Windows: Hello World Review
- RabbitMQ for Windows: Exchange Types
- RabbitMQ for Windows: Direct Exchanges
- RabbitMQ for Windows: Fanout Exchanges
- RabbitMQ for Windows: Topic Exchanges
- RabbitMQ for Windows: Headers Exchanges
If you’re interested in getting started with distributed programming and you develop on the Microsoft Windows platform, RabbitMQ may be what you’re looking for. RabbitMQ is an open source, standards-based, multi-platform message broker with client libraries available for a host of development platforms including .Net.
This series will provide a gentle introduction to getting started with RabbitMQ for .Net developers, including a Windows environment installation guide along with an introduction to basic concepts and features through the use of examples in C#. In this first installment, we’ll cover installation and basic configuration.
Installation
The first thing to know about RabbitMQ installation is that RabbitMQ runs on the Erlang virtual runtime. “What is Erlang”, you ask, and “Why should I ask our admins to install yet another runtime engine on our servers”? Erlang is a functional language which places a large emphasis on concurrency and high reliability. Developed by Joe Armstrong, Mike Williams, and Robert Virding to support telephony applications at Ericsson, Erlang’s flagship product, the Ericsson AXD301 switch, is purported to have achieved a reliability of nine “9”s.
A popular quote among Erlang adherents is Verding’s “First Rule of Programming”:
“Any sufficiently complicated concurrent program in another language contains an ad hoc informally-specified bug-ridden slow implementation of half of Erlang.” – Robert Verding
Sound like the perfect platform to write a message broker in? The authors of RabbitMQ thought so too.
With that, let’s get started with the installation.
Step 1: Install Erlang
The first step will be to download and install Erlang for Windows. You can obtain the latest installer from here (version R15B at the time of this writing) .
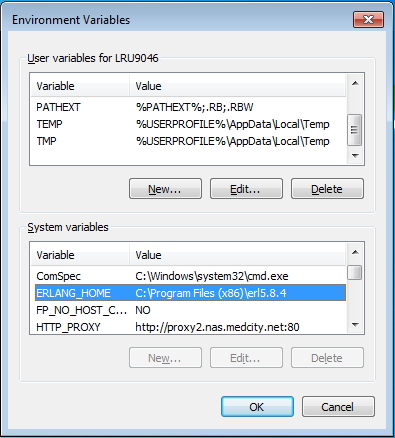
After downloading and completing the Erlang installation wizard, you should have a new ERLANG_HOME environment variable set. If not, you’ll want to set this now so RabbitMQ will be able to locate your installation of Erlang.
Step 2: Install RabbitMQ
Next, download and install the latest version of RabbitMQ for Windows from here (version 2.7.1 at the time of this writing).
Step 3: Install the RabbitMQ Management Plugin
By default, the RabbitMQ Windows installer registers RabbitMQ as a Windows service, so technically we’re all ready to go. In addition to the command line utilities provided for managing and monitoring our RabbitMQ instance, a Web-based management plugin is also provided with the standard Windows distribution. The following steps detail how to get the management plugin up and going.
First, from an elevated command prompt, change directory to the sbin folder within the RabbitMQ Server installation directory (e.g. %PROGRAMFILES%\RabbitMQ Server\rabbitmq_server_2.7.1\sbin).
Next, run the following command to enable the rabbitmq management plugin:
rabbitmq-plugins.bat enable rabbitmq_management
Lastly, to enable the management plugin we need to reinstall the RabbitMQ service. Execute the following sequence of commands to reinstall the service:
rabbitmq-service.bat stop
rabbitmq-service.bat install
rabbitmq-service.bat start
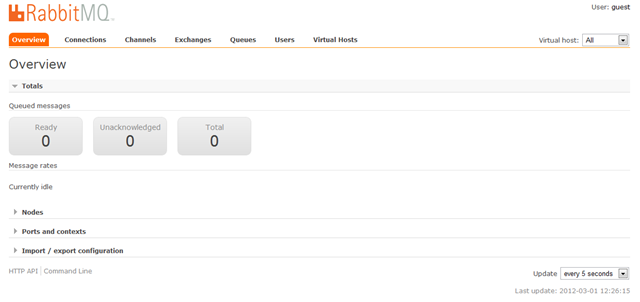
To verify management plugin is up and running, start your favorite browser and navigate to http://localhost:55672/mgmt/. If everything went ok, you should see a screen similar to the following:
Note: The management plugin URL has been changed to http://localhost:15672/ for versions 3.0 and higher.
From here, you’ll be able to configure and monitor your RabbitMQ instance.
That concludes our installation guide. Next time, we’ll walk through writing our first RabbitMQ C# application.
</b>


