Use gitk to understand git
Moving from subversion to git can be a struggle, trying to understand what terms like checkout, commit, branch, remote, rebase all mean in the git world. I learned by experimenting in a demo repository, trying out various commands, and using gitk to visualize their impact. This post is broken up into two parts – after reading this, you may want to read the second part.
The gitk screen
I created a simple repository on github to walk through some scenarios. I’ll start by creating a local copy of the repository:
d:code>git clone git@github.com:joshuaflanagan/gitk-demo.git
Initialized empty Git repository in d:/code/gitk-demo/.git/
remote: Counting objects: 9, done.
remote: Compressing objects: 100% (4/4), done.
remote: Total 9 (delta 0), reused 0 (delta 0)
Receiving objects: 100% (9/9), done.

d:code>cd gitk-demo

d:codegitk-demo>gitk --all
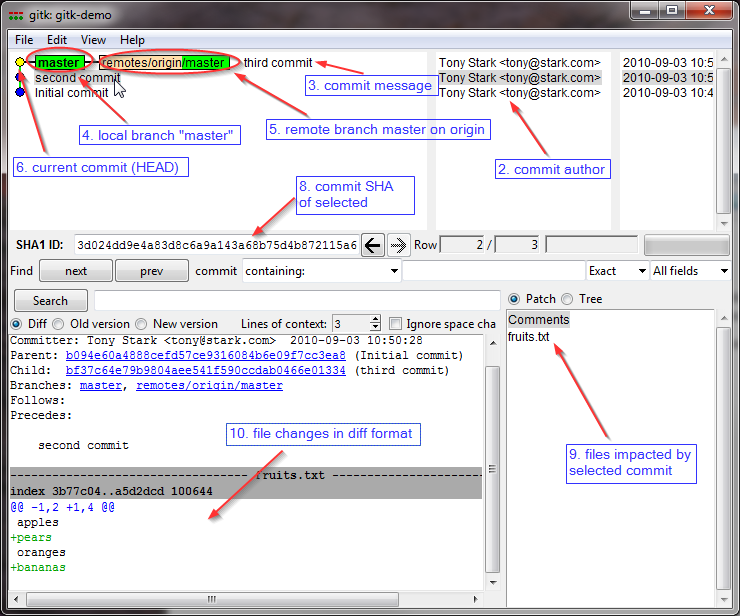
There is a lot of information in this single screenshot:
- The upper left pane shows the series of commits to this repository, with the most recent on top.
- There have been three commits, all by Tony Stark.
- The commit message for the most recent commit was “third commit”
- There is a single local branch, named “master’”, it points to the most recent commit
- There is a single remote reference branch: the “master” branch from the remote repository named “origin”, it also points to the most recent commit
- The yellow dot next to the top commit indicates that is the snapshot currently in my working folder (referred to as HEAD)
- I’ve highlighted the second commit, so that I can see its details in the lower pane
- The commit SHA (unique identifier, similar to subversion revision number) of the second commit is 3d024dd9e4a83d8c6a9a143a68b75d4b872115a6
- The lower right shows the list of files impacted by the second commit
- The lower left shows the commit details, including the full diff
- Clicking a file in the lower right pane scrolls the diff in the lower left pane to the corresponding section
A note about “master” and “origin”
When you first create a git repository, it starts with a single branch named “master”. There is nothing special about this branch, other than it is the default. You are free to create a new one, and delete master (although, I don’t see any reason to go against the default convention).
When you first clone a git repository, git will automatically create a remote for you named “origin”. A remote is just a name used to manage references (URLs) to other repositories. There is nothing special about the “origin” remote, other than it is created for you. You are free to create a new one and delete origin. In fact, if you are working with multiple remotes, I recommend you delete the origin remote and create a new one for the same repository, but using a more descriptive name. For example, when I work with the FubuMVC source code, in my local repository I have a remote named “darth” which refers to the main repository owned by DarthFubuMVC, and a remote named “josh”, which refers to my fork. If I had kept the name “origin”, I would always have to remember which one I cloned from.
Branching
What happens when I create a branch?
d:codegitk-demo>git branch issue123
Press CTRL-F5 in the gitk window to refresh the repository view
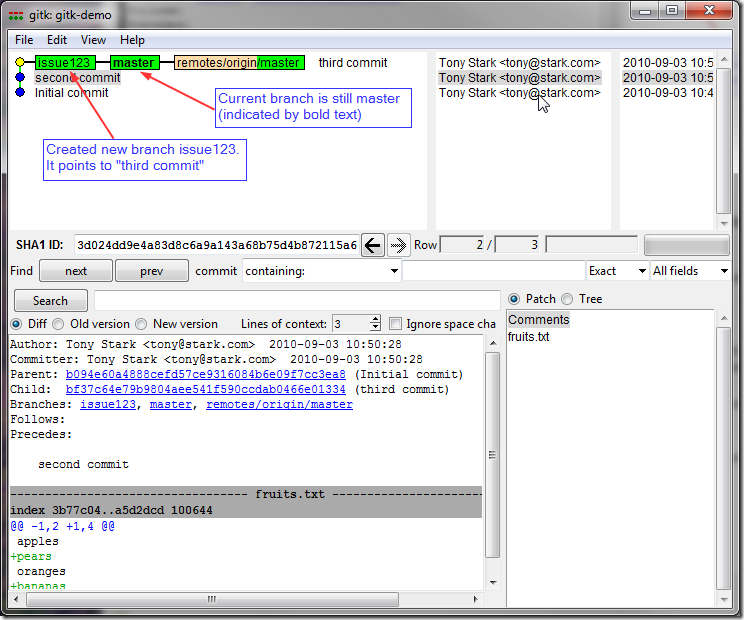
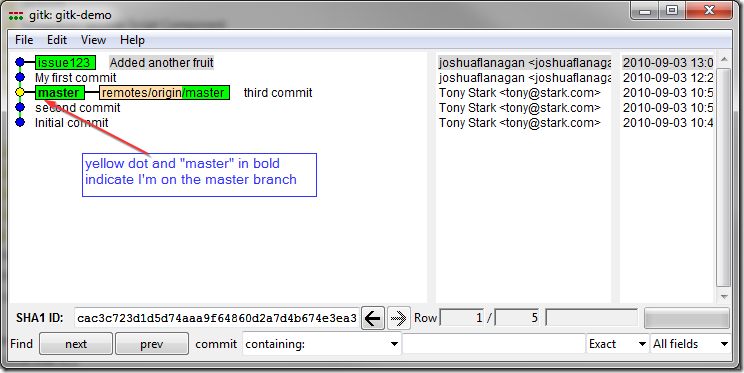
We see the new branch marker for the issue123 branch points to the same commit as master and origina/master. It is important to note that the “master” is bold, indicating that is still the current branch. The bold branch label is equivalent to the asterisk in the command line output:
d:codegitk-demo>git branch
  issue123
* master
Now if I switch to the new branch and refresh gitk:
d:codegitk-demo>git checkout issue123
Switched to branch 'issue123'
(We’re going to focus on information in the top pane from now on, so I’ll hide the bottom part of gitk)
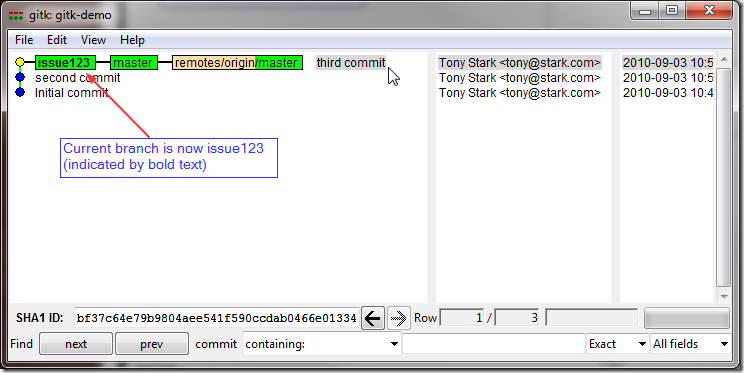
Note: For convenience, I could have created and switched to the new branch in a single command: git checkout –b issue123
Making changes
When I refer to the “current branch”, I mean “the branch that will advance when I perform a commit”. This is where the gitk visualization really starts to help. I’ll make some changes to a file and then commit with the message “My first commit”:
d:codegitk-demo>git commit -am "My first commit"
[issue123 f948bf8] My first commit
 1 files changed, 2 insertions(+), 1 deletions(-)
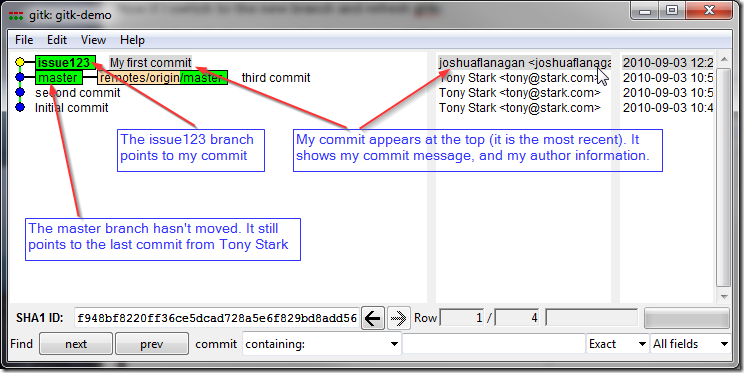
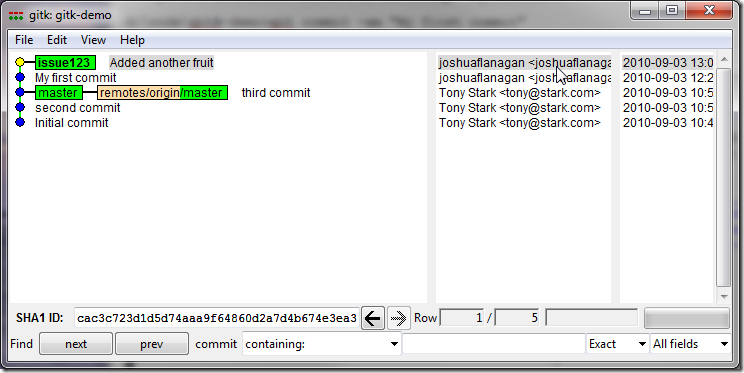
The issue123 branch now points to my new commit. Neither the master nor origin/master branch pointers have moved.
As I continue to commit, the current branch pointer moves with me:
d:codegitk-demo>git commit -am "Added another fruit"
[issue123 cac3c72] Added another fruit
 1 files changed, 1 insertions(+), 0 deletions(-)
But I thought it was a branch
Since I was working in a branch, I expected to see a tree stucture, with nodes turning off from the main “trunk”. Something like this:
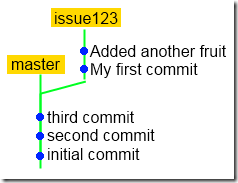
Instead, gitk shows all of the commits as a single straight line. When first using git, this was very confusing to me. My confusion stemmed from my misunderstanding of branches in git. Thinking about why gitk was showing all of the commits in a straight line finally brought the point home. In git, a branch is a label for a commit. The label moves to new commits as they are created. When you create a git branch, you are not changing anything in the structure of the repository or the source tree. You are just creating a new label.
Fast forward
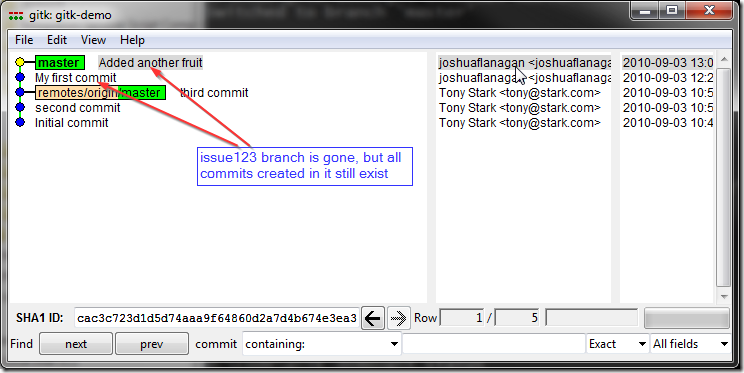
After completing my work in the issue123 branch, I’ll want to merge the changes back into master. Usually when I think of a merge, I think of comparing two trees and applying the differences from one onto the other. I imagine each commit being replayed on the other branch. Merging issue123 into master would require applying each of my two commits to the master branch. However, this work has already been done, when I first performed the commits. Because the master label hasn’t moved since my work began on issue123, applying the diffs would end up with the same result. This is where the “single straight line” visualization really proves valuable – I can see that issue123 is directly ahead of master. Git is smart enough to recognize this situation and performs what it calls a fast-forward merge. A fast-forward merge isn’t really a merge at all – since no file content comparisons are necessary – it simply moves the master branch label up to point to the commit pointed at by the issue123 label.
To merge the changes from issue123 into master, I first checkout (switch to) the master branch and then do the merge:
d:codegitk-demo>git checkout master
Switched to branch 'master'
d:codegitk-demo>git merge issue123
Updating bf37c64..cac3c72
Fast-forward
 fruits.txt     |    1 +
 vegetables.txt |    3 ++-
 2 files changed, 3 insertions(+), 1 deletions(-)
</p>
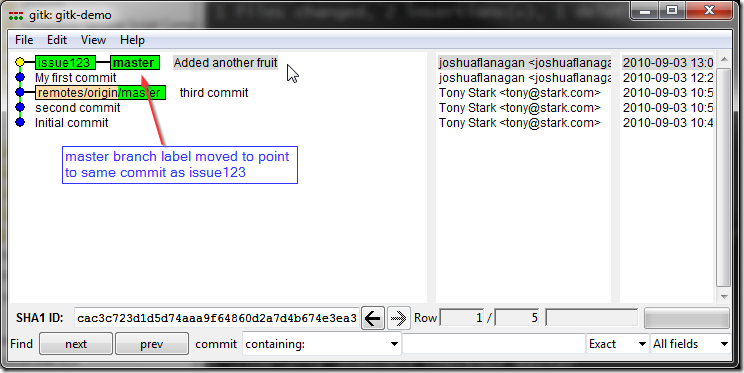
A few things to notice:
- The command-line output indicated the merge was a “Fast-forward”.
- A new commit was not created. There is no new snapshot of the repository required, since there is no new version of any files/folders that didn’t already exist in the repository.
- The remote origin/master branch has not moved. Everything we’ve done so far (except for the initial clone) has run completely locally, without contacting the github server.
Deleting a branch
The issue123 branch label is now redundant, since it points to the same commit as master. If there is no more work to do for issue123, we can safely get rid of the branch, without losing any historical information. If we later find out we need to make some changes to solve the issue, we can always create another branch (which is just a label). This is what it means when people say that branching in git is easy or lightweight.
d:codegitk-demo>git branch -d issue123
Deleted branch issue123 (was cac3c72).
Sharing with the world
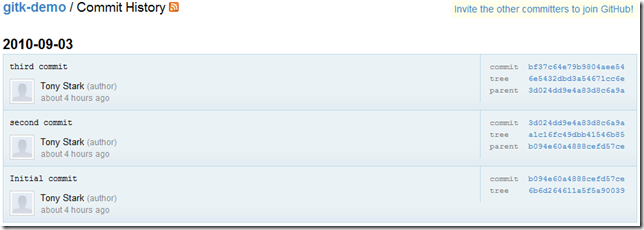
As noted above, everything we’ve done so far has been in our local copy of the repository. The “master” branch at the “origin” remote has not moved. If I look at the github page for the repo, I can confirm that none of my commits exist.
To copy changes from my instance of the repository up to github’s servers, I need to push from my master branch to the “master” branch of my remote named “origin”.
d:codegitk-demo>git push origin master
Counting objects: 9, done.
Delta compression using up to 2 threads.
Compressing objects: 100% (4/4), done.
Writing objects: 100% (6/6), 609 bytes, done.
Total 6 (delta 0), reused 0 (delta 0)
To git@github.com:joshuaflanagan/gitk-demo.git
   bf37c64..cac3c72  master –> master
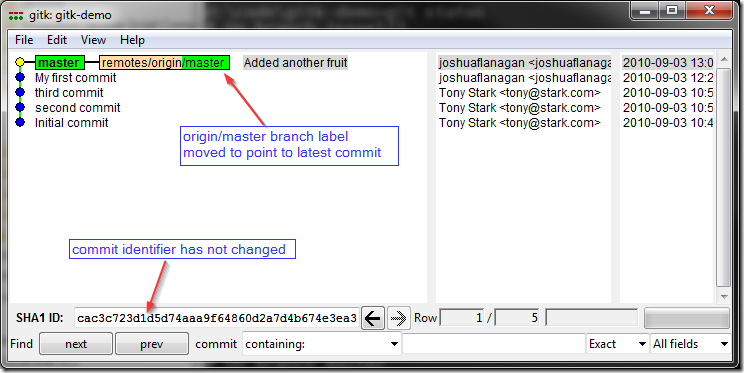
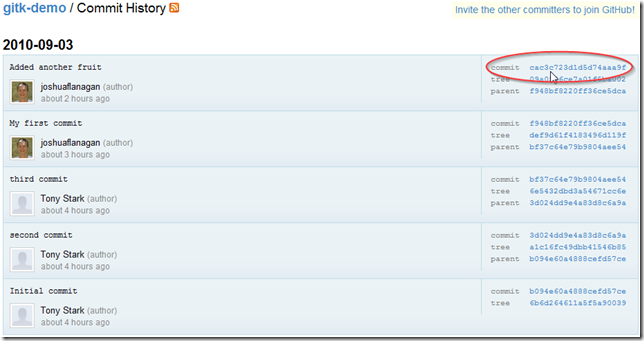
Take note of the SHA1 ID of the latest commit, cac3c723…. Look back at the previous screenshots and notice that this identifier has not changed through all of the operations (merge, deleting the branch, etc). When we refresh the github page, we can see it has updated with all of the work I did locally. Notice the commit identifier on the web page matches up with the SHA1 ID we see locally. Also, there is no indication that any of the work was done on a separate branch – nobody ever needs to know. You are free to branch as much as you want locally without impacting a shared repository.
To be continued
Continue to part 2 to see the difference between merge and rebase.

