Unit Test Logging for Builds with Xcode 4 and Team City
One of the things I wanted to do after getting comfortable with the iOS/Mac platform(s) was trying to take my “agile” ways to the platforms (for this post specifically testing). I started learning all this in the Xcode 3 days. I really think with the release of Xcode 4, things are getting much better. WIth workspaces, schemes and better unit testing integration, I believe Xcode 4 is making my life as a developer easier on the platform.
All the code for this project can be found on github here.
Unit Testing
Unit testing is by far the lowest hanging fruit. I spent a good bit of time learning the shipping tools for Xcode (OCUnit). I also spent some time looking at the unit testing tools like GHUnit and Google Toolbox for Mac (GTM), yet I am pretty pragmatic and found that for the most part, OCUnit did what I needed. The only other tool that I use for testing is OCMock. I know a lot of people also use OCHamcrest for extending the assertion macros, I just have not found I use it myself. I know a lot of people are using specifications these days to do more user level testing. There are a few projects out there that you might find interesting:
Continuous Integration
This is where the rubber meets the road. Getting your software working on your machine is one thing (and sometimes a hard thing), yet having a repeatable automated build that can build and test your software on another machine is something that makes me feel all warm and fuzzy inside. I have been using JetBrain’s TeamCity for a few years now and wanted to get my project building, archiving, reporting unit tests and possibly code coverage (more about code coverage in another post).
Getting TeamCity up and running is fairly straightforward.
- Download the latest version of TeamCity
- Open a Terminal Window
- Change to the directory where you unzipped TeamCity (/Application/TeamCity)
- Change to the bin directory
- Run TeamCity by executing the runAll.sh script (./runAll.sh start)
The hard part was getting the project running with test output, which is what this long winded post is all about.
Team City Project Setup
Using a sample project based on the bowling game unit testing example, here is how the project is setup. This is based on the sample for the OCUnitLogger project. This is a very simple setup and you can make this as complicated (or as easy) as you need it to be.
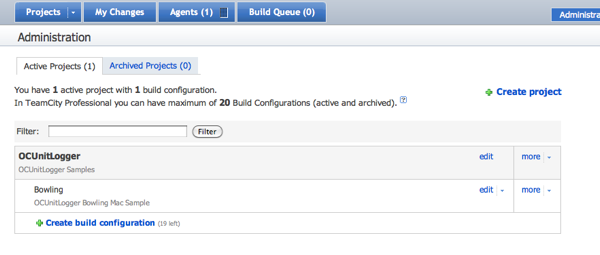
Setup a Project
I created a project called OCUnitLogger and give it a good description.
Setup a Build Configuration
I created one called Bowling with a description.
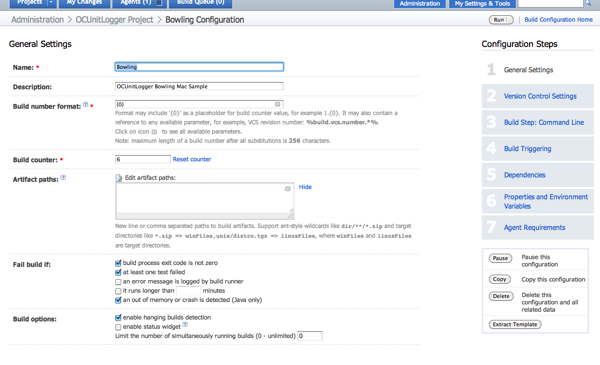
Setup the General Settings
I left all the defaults on this one.
_Setup the Version Control Settings
_ I left the defaults on most of these
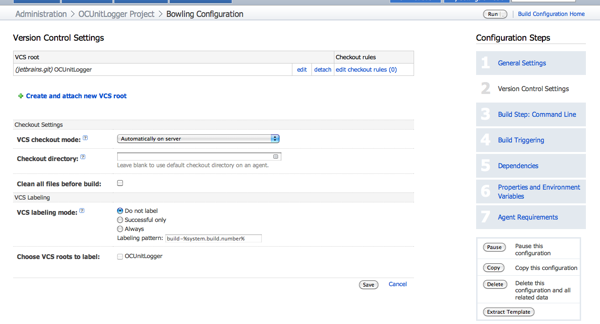
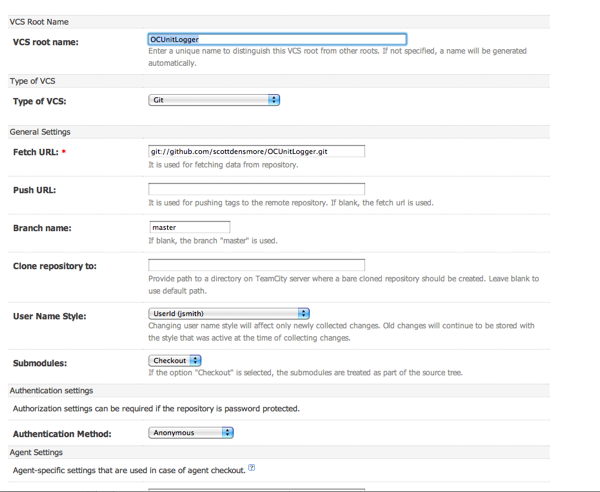
Setup a VCS Root
I set this to use git and check out anonymously using the default polling policy.
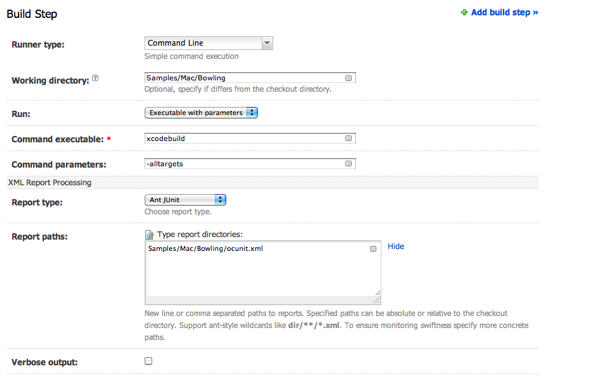
Setup a Build Step
This build step is probably the most important part. Building the project is quite easy. You setup the build to build from the command line using xcodebuild. (You can see usage for xcodebuild using xcodebuild -usage.) I have setup this project to just build all targets for this project. Also, I setup the reporting for my tests as JUnit and where it can find the xml file (more on this later).
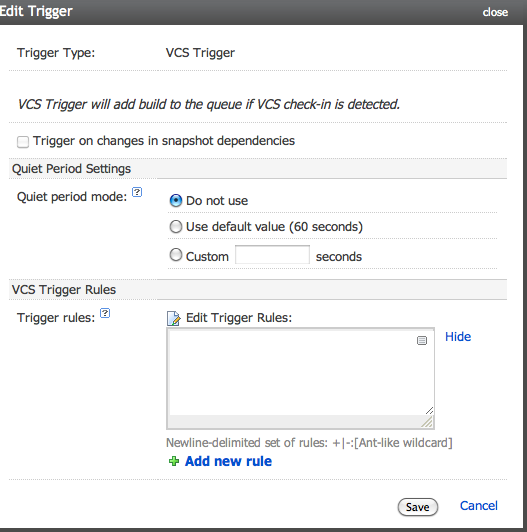
Setup a Build Trigger
We want the build to trigger every time a checkin occurs so we set that up.
 The Logger
OCUnit works using the NSNotificationCenter. By creating a new object to listen for the events, we can create an xml document that mimics JUnit output.
NSNotificationCenter *center = [NSNotificationCenter defaultCenter];
[center addObserver:self selector:@selector(testSuiteStarted:) name:SenTestSuiteDidStartNotification object:nil];
[center addObserver:self selector:@selector(testSuiteStopped:) name:SenTestSuiteDidStopNotification object:nil];
[center addObserver:self selector:@selector(testCaseStarted:) name:SenTestCaseDidStartNotification object:nil];
[center addObserver:self selector:@selector(testCaseStopped:) name:SenTestCaseDidStopNotification object:nil];
[center addObserver:self selector:@selector(testCaseFailed:) name:SenTestCaseDidFailNotification object:nil];
The new object is called OCUnitToJUnitLogger. I create a static instance and in each notification we generate the required nodes. I am using the Google Data XML node so that this works in both a Mac and iOS project.
static OCUnitToJUnitLogger *instance = nil;

static void __attribute__ ((constructor)) OCUnitToJUnitLoggerStart(void)
{
    instance = [OCUnitToJUnitLogger new];
}

static void __attribute__ ((destructor)) OCUnitToJUnitLoggerStop(void)
{
    [instance writeResultFile];
    [instance release];
}
The output goes to a file called ocunit.xml. You can change this in the OCUnitToJUnitLogger.m on line 88.
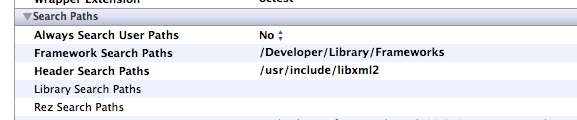
It is pretty easy to use. Drag the Logger folder into your project for your unit testing bundle and build. You will also need to add the libxml2.2.7.3 (or the latest) library to your link phase and then add /usr/include/libxml2 to the header search path.

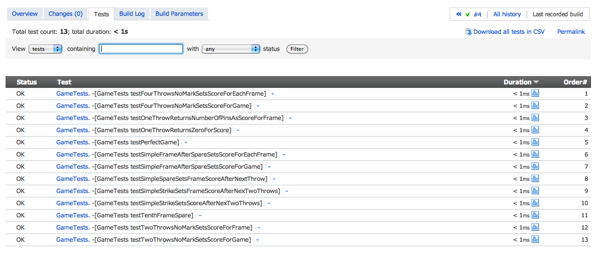
The Bowling Project
The bowling project is a Coca Framework project created with Unit Tests. It is pretty standard stuff. The only thing I did was add the logger to the project and this is what I get from TeamCity:
Conclusion
This is a pretty simple add to any of your projects. If you are using TeamCity and want to have a good log for your unit tests, you can drop this in and have TeamCity do the rest. If you want to make it better please fork from here and pound away.