AngluarJS–Part 10, Intermezzo
Introduction
This is a series of posts about AngularJS and our experiences with it while migrating the client of a complex enterprise application from Silverlight to HTML5/CSS/JavaScript using AngularJS as a framework. So far I have published the following posts
- AngularJS – Part 1
- AngularJS – Part 1, Feedback
- AngularJS – Part 2, the controller
- AngularJS – Part 3, Inheritance
- AngularJS – Part 4, Accessing server side resources
- AngularJS – Part 5, Pushing data to the server
- AngularJS – Part 6, Templates
- AngularJS – Part 7, Get ready to test
- AngularJS – Part 8, More choice when testing
- AngularJS – Part 9, value and constants</ul> I got some feedback from readers that they didn’t like that I never introduces how to implement a RESTful API which can then be consumed by an Angular application. I though that I should change this and have decided to publish this post where I show how a simple REST API can be implemented.
A simple REST API
In my previous posts I have used the Angular $http service to access server side resources that were presented to the client as RESTful resources, but I never went into much detail about how to provide those resources. As of this writing there exist various ways how such a RESTful API can be implemented. Let’s pick two of the many ways.
Using a NodeJs module
We have been using NodeJs in the past to provide the infrastructure for unit tests (see here and here). Now that we already know how to install Node we can as well use it for other tasks. There is a huge eco system around Node and many node modules exist that make the implementation of a RESTful API a breeze. For this sample I will use the restify module. For a broader selection of modules please have a look here.
To install restify open a command prompt in admin mode and execute the following command (I assume that NodeJs is already installed, otherwise install it from here)

This will install restify globally such as that it is available from any location. By omitting the parameter –g we could also install it locally into the current folder. The particular version of restify would then only be available for this current folder. But for the moment let’s just install it globally.
Now we’re good to go. It is very easy to implement a simple web server that listens at a given port and serves the caller some resources. We want to implement an API that provides us a list of tasks whenever we invoke a HTTP GET request to the URL /tasks and that provides us the details of a single task when we invoke an HTTP GET request to the URL /tasks/:id where :id is a placeholder for a valid positive number that is equivalent to the ID of a task.
Using your favorite editor create a new JavaScript file and call it server.js. Add the following code to create a server that listens at port 8080.

On the first line we tell Node to load the restify module. On the second line we use restify to create an HTTP server (restify creates a wrapper around the node HTTP server). On the third line we instruct the server to listen at port 8080 for incoming requests (the server will remain running until the application is terminated). The listen function accepts a callback function as second parameter which is called whenever the server is started and listening at the defined port. In our case we just give a feedback on the console that the server has started listening.
Save the file and on the command line (e.g. Bash console) start the server with the following command

The output in my Bash console looks like this

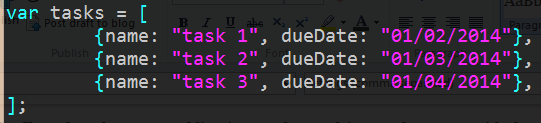
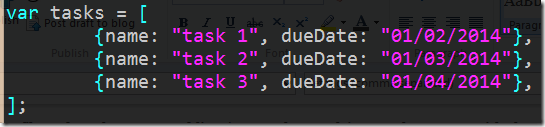
Ok, we have a running server, but that’s not very interesting yet since it does not do anything. Thus lets define two routes, one for the /tasks URL and the other for the /tasks/:id URL and define what the server shall do when either of them is called. In our simple sample we will play with pre-canned data. Thus the first thing we’ll do is define a tasks variable as an array of tasks at the top of our server.js file.
Then we define the first route like this (right after the code that creates the server)
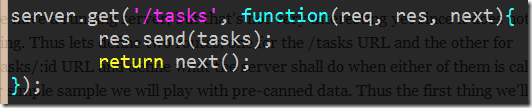
The above code snippet defines the following: whenever a HTTP GET request to the URL /tasks is issued by a client then execute the given callback function. The callback function has three parameters, the request, the response and the function to call next when done with processing. In our sample we do not use the request parameter. We use the response parameter and its send method to send back the pre-canned list of tasks to the calling client. Finally we call the next function and return its result.
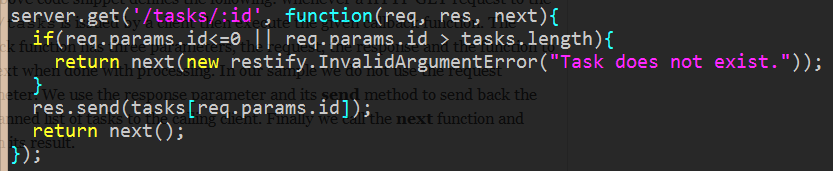
Our second route looks like this
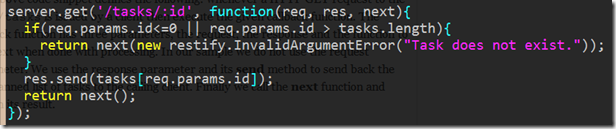
Here we define that whenever a HTTP GET request to an URL like /tasks/3 is issued by a client the the given callback method is executed. The request params object/collection provides us the value of each parameter defined in the URL. In our case we have only one parameter, the value :id. In the code of the callback function we first make sure that the value is a positive number smaller than the length of the tasks array. If the value is outside this range we throw an InvalidArgumentError which is defined by the restify module. Otherwise we return the task at the index equal to the value of :id.
 Note: after saving our changes to the server.js file we have to restart the HTTP server such as that it can pickup the changes. Thus stop the server (if you have not done this already) by pressing CTRL-C and restart it.
Now let’s test our first RESTful API. Let’s use cURL to do this. Open another console and issue the following command

If you have everything done as described above the result of this command should look like this
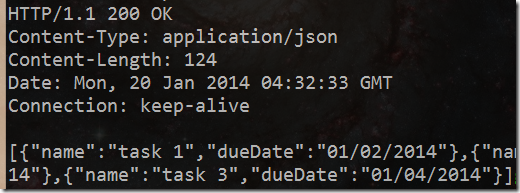
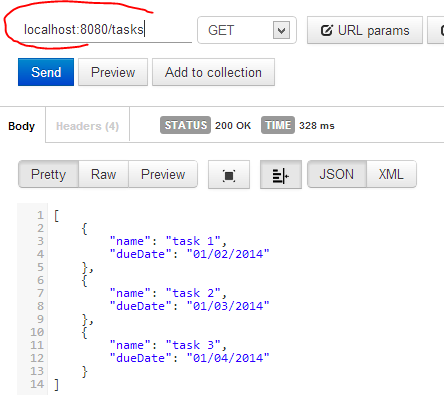
The server responded with a 200 OK status and the response body is encoded as JSON. We did indeed get the list of tasks back.
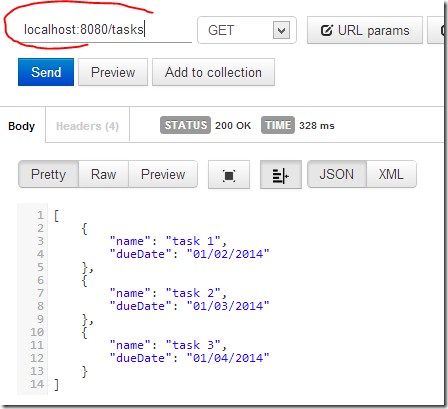
Now instead of cURL we can also use Postman, a REST client for Google Chrome which will produce this nicely formatted result
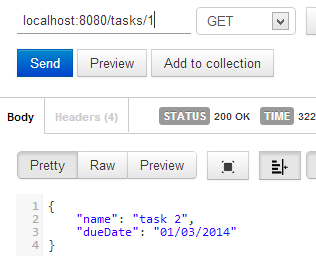
If we now want to retrieve the details of say the second task in the list of pre-canned value we can do this by issuing a call to /tasks/1

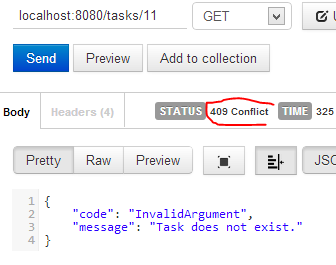
And indeed the server returns the expected result. Now let’s test it with an invalid :id parameter

Notice the status code 409 and the details of the error in the body.
Using ASP.NET Web API
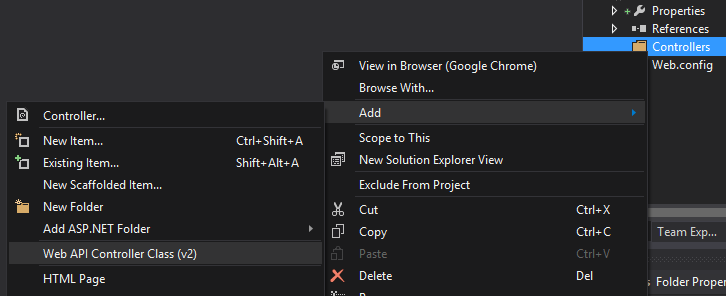
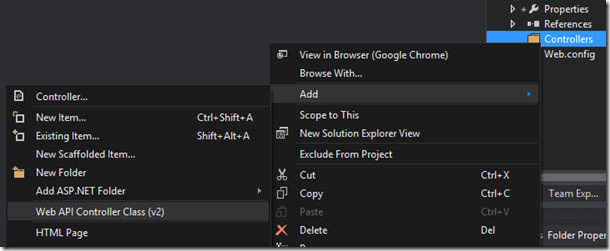
We can use Visual Studio to create an implementation of the same RESTful API. In this sample we’re going to use Visual Studio 2013. Create an empty ASP.NET Web application. Add a folder Controllers to the project. Right click on the Controllers folder and select Add Web API Controller Class
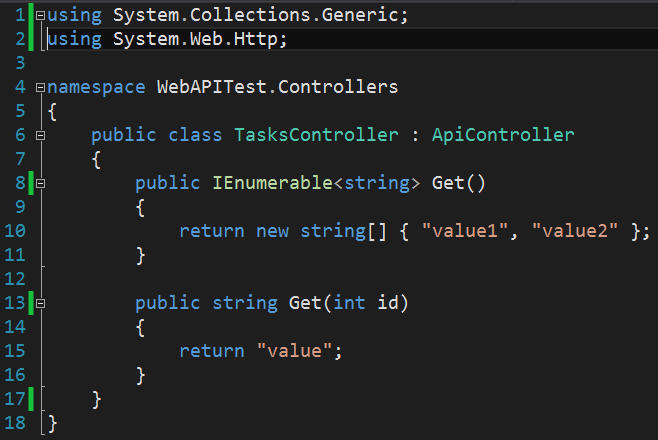
Name the controller TasksController. Delete all unnecessary code until your file looks like this
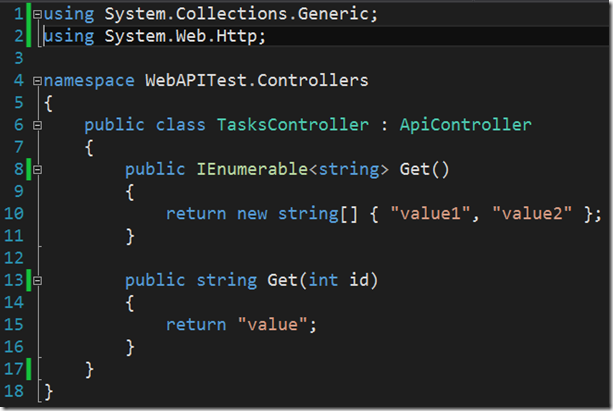
we only want to implement logic for the two HTTP GET calls to the /tasks and the /tasks/:id URL.
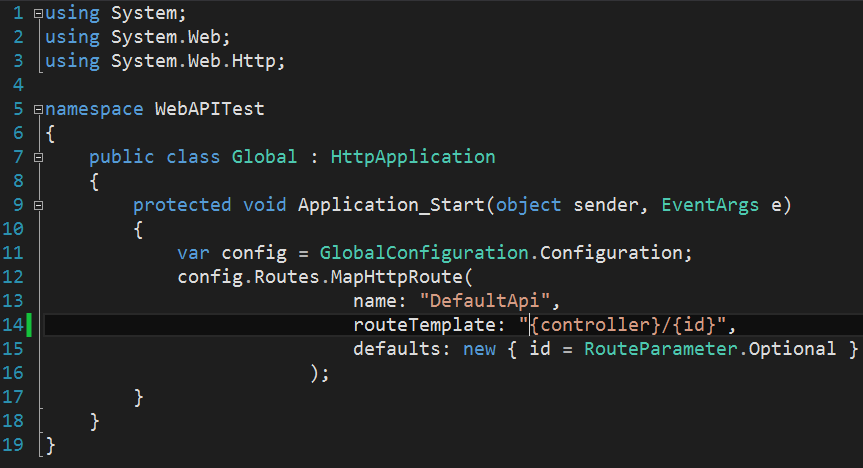
Now we also need to configure routing for our application. We can do this during startup of the Web application. Thus we add a Global.asax file to the solution which will contain the code necessary to configure routing. Right click on the web project in the solution explorer and select Add –> New Item… Select the Global Application Class template. Delete all unnecessary code in the Global.asax.cs file and add this code instead
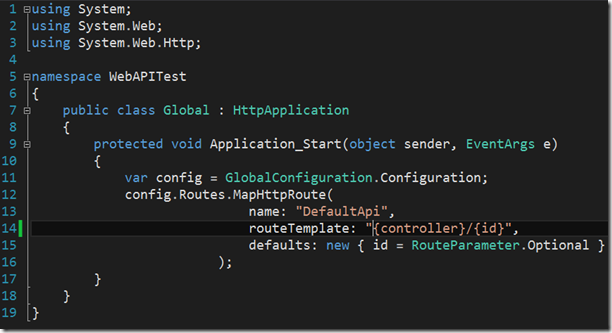
In the above code we define a routing using a template based approach. Our template is {controller}/{id} where the parameter {id} is optional. The {controller} parameter is mapped to Web API a controller with the same name minus the Controller postfix. Thus /tasks is going to be mapped to the TasksController. More precisely, the HTTP GET request on the URL /tasks is mapped to the parameter-less Get method of the TasksController. A HTTP GET request on the URL say /tasks/2 is mapped to the second Get method of the TasksController class where the parameter id will contain the value 2.
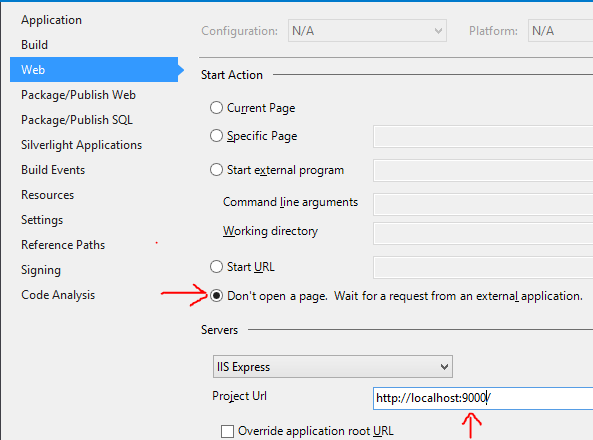
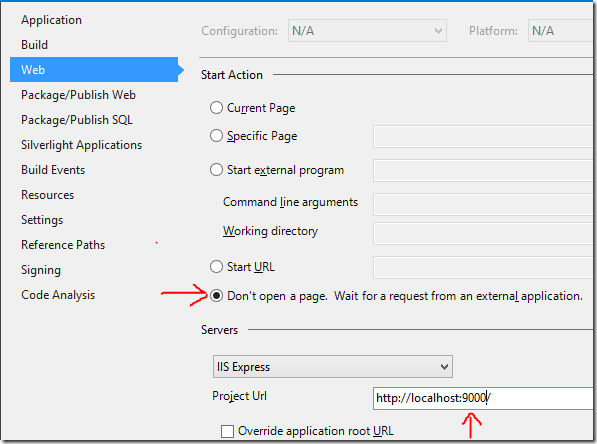
Open the properties page of the project and on the Web tab make sure that you configure the app to run without opening a page and to configure IIS Express to listen at port 9000
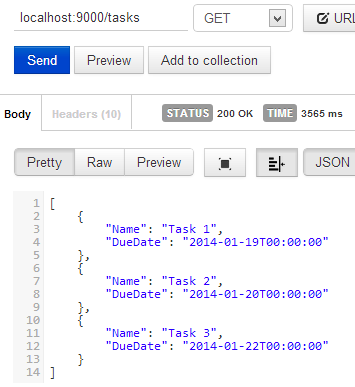
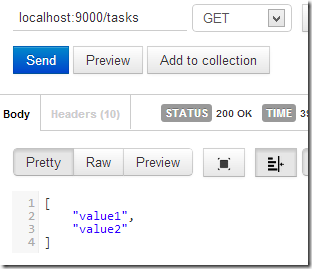
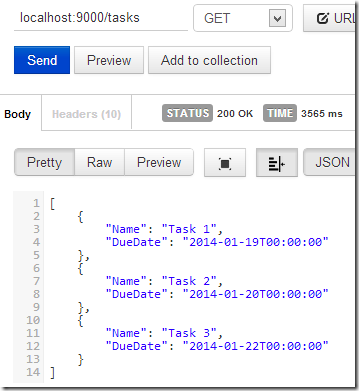
Now run the application. Use the Postman REST client extension in Chrome or cURL to test the application. When using Postman we get this result
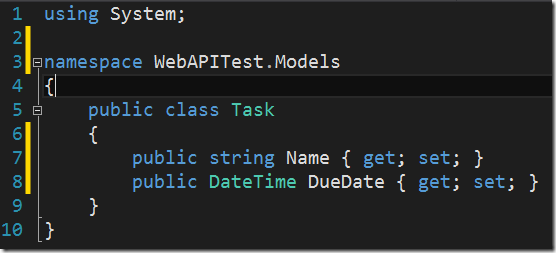
Ok, fine, we get some data back. It is not yet the list of tasks though and thus we have to add some more code to our project. First we add a folder Models to the VS project. To the Models folder we add a class called Task. The code should look like this
Now we change our TasksController and make it look like this
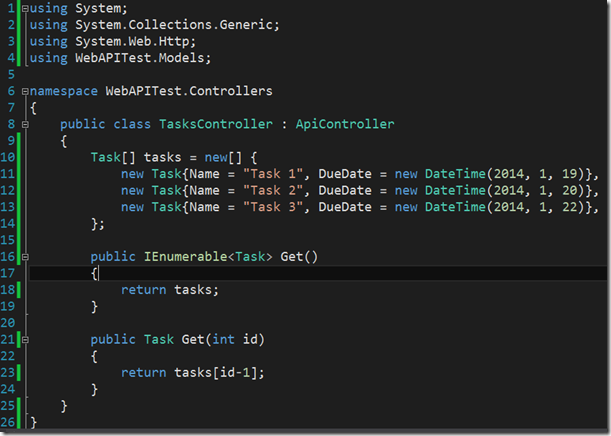
We have added an instance variable tasks to the class that contains our pre-canned list of tasks. In the parameter-less Get method we just return the list of tasks while in the second Get method we return the item of the tasks list whose index is equal to the ID passed by the client minus one.
The result now looks the same as in the sample using the NodeJs module restify. The only difference is that the values were serialized into JSON objects whose properties are not following the camel casing notation of JavaScript but rather the Pascal casing convention of C#.
Summary
In this post I have shown how we can implement a simple RESTful API using either the NodeJs module restify or the ASP.NET Web API framework of Microsoft. Any REST API can easily been tested by using either the cURL command line tool or the Postman extension for Google’s Chrome browser.
- AngularJS – Part 7, Get ready to test
- AngularJS – Part 6, Templates
- AngularJS – Part 5, Pushing data to the server
- AngularJS – Part 4, Accessing server side resources
- AngularJS – Part 3, Inheritance
- AngularJS – Part 2, the controller
- AngularJS – Part 1, Feedback